As a Data Warehouse Consultant, I´m often asked the following by customers: “Is it possible to enrich our dimension data with some manually maintained data” and the answer is always “yeah, of course”. However, quite quickly the questions of:
- Who should input this data
- How do I inform that a new dimension value is available
- In which system should the user import this data
- And how can it been done in a user friendly manner
I have successfully used Master Data Services from SQL Server 2012 to manage this challenge.
Master Data Services offer an Excel plugin and a web application that makes it easy for business users to push data to a SQL Server. This tutorial will focus on the Excel plugin for pushing data.
This blog post will explain how you can push data from your SQL Server to your MDS implementation, thereby making it possible for the business user to enrich the data.
I have created an MDS entity as follows:

I would now like to push a new data row from my Data Warehouse solution to the MDS Entity, thereby making it possible for the business user to fill out the “MyMdsColumn” value. My DW table looks as follows:

Notice that row number 3 does not exists in the MDS entity.
The SSIS Package
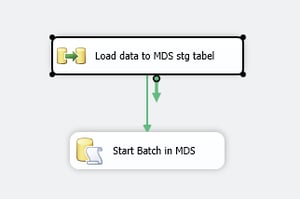
I have created an SSIS package that looks as follows:
Control flow:
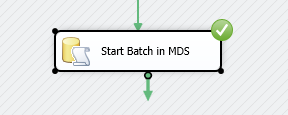
The control flow consists of a data flow that pushes data to the MDS entity. An Execute SQL Task that starts the import batch in the MDS solution (more on that later..)
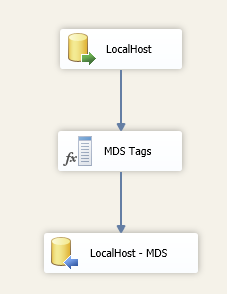
Data Flow:
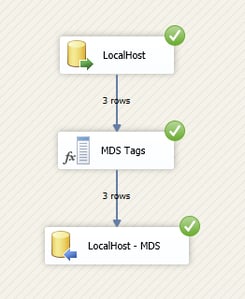
The data flow consist of an OLE DB Source that collects the data from the table, a Derived Column component that sets the required setting for the MDS and finally an OLE DB Destination that inserts the data in an MDS stage table.
The import process
MDS will automatically create a staging table for you when you create a new entity in MDS. The staging table is placed under the schema [stg] and is named as your entity´s name concatenated with “_Leaf”.
This table serves as a temporary repository before the data is processed against the MDS entity.
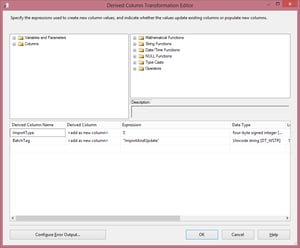
MDS requires two types for information when importing to MDS, hence Import Type and Batch Tag (see picture below).
Import Type specifies which type of import action you want MDS to do for you. The options are:
Please check this link for a more detailed explanation of the different import types. Please read the following for a complete explanation of the different import types: http://technet.microsoft.com/en-us/library/ee633854.aspx
The Batch Tag is a name that you specify for the data. The Batch Tag is used later when asking MDS to process a specific Batch Tag.
The picture below shows how I mapped the data from my Data Warehouse to the staging table in MDS.
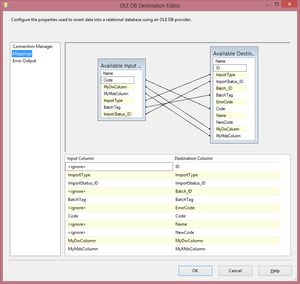
I can now run my Data Flow, thereby importing the third row in the Data Warehouse table to the staging table in MDS.
MDS recognizes the imported data with the Batch Tag “ImportAndUpdate”. Notice, in the picture below that the batch as not yet been run.

To run the batch, the Execute SQL Task from the Control Flow needs to run. It contains the following SQL script:

The script executes a stored procedure from the MDS database. Executing the script tells MDS to start the batch with the Batch Tag “InsertAndUpdate”.
Turning our attention to the MDS again, we see that the batch has now successfully run.

Now, I refresh my entity in Excel and see that a new row (the third row) has been added to my MDS entity.

It is now possible for the business user to fill out the “MyMdsColumn” column for later lookups by the ETL load.
This concludes the brief tutorial of how to import data to your SQL Server 2012 Master Data Service solution.
Next up is how to expose your entity data to your Data Warehouse or other systems. This won´t be explained here, but it is easily done with subscription views in MDS.
Any questions?
Please reach out to info@inspari.dk or +45 70 24 56 55 if you have any questions. We are looking forward to hearing from you.


